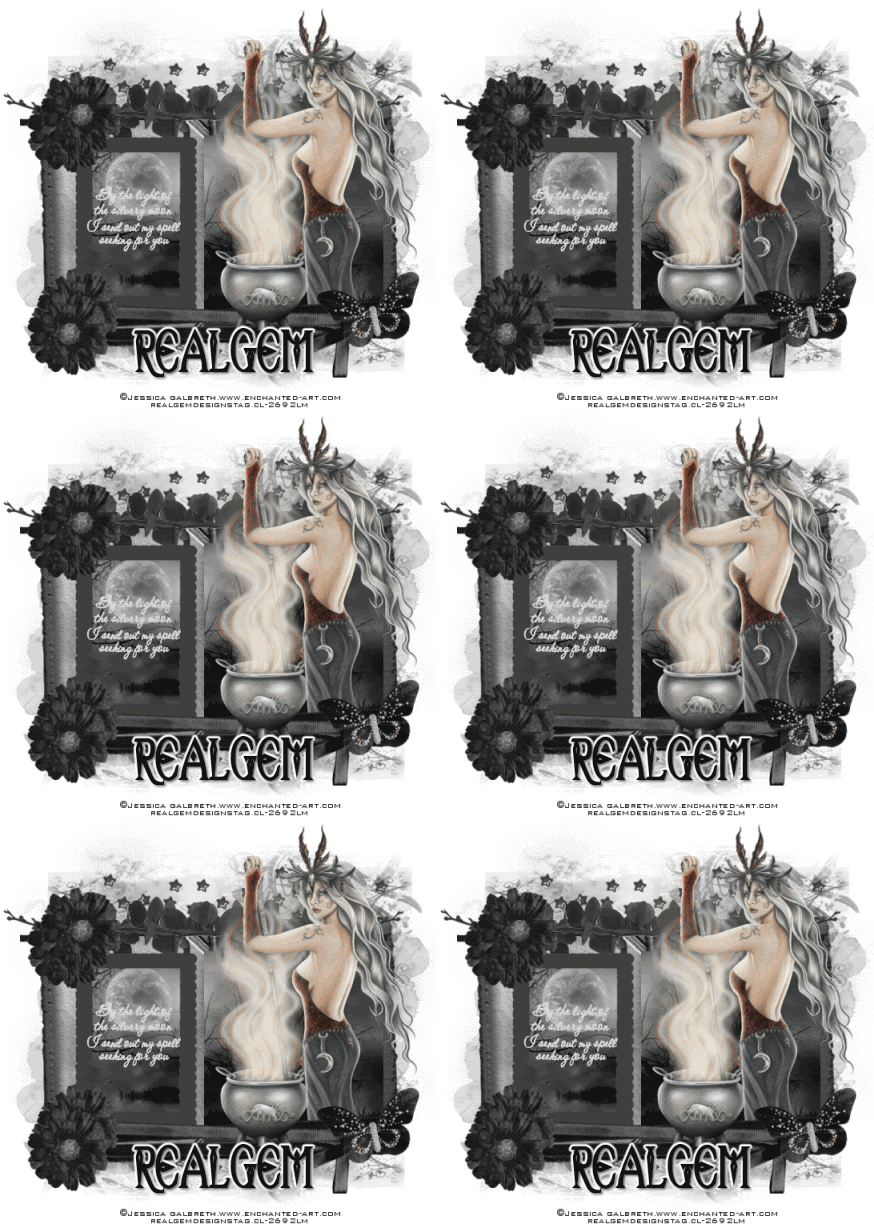
I am using the truly stunning mythical artwork of Jessica Galbreth which you can purchase from CILM
This tutorial requires a good knowledge of psp and animation shop
Filter used if animating EyeCandy5 Nature
Supplies can be download from
http://www.4shared.com/file/89570510/eaba621a/silvery_moon_tut.html
Scrapkit used is by the talented PimpdYourTags The Kit is called Your are my life now you can download from the link below
http://pimp-your-tags.blogspot.com/2009/02/you-are-my-life-now-freebie.html
In the supplies you will find the font I used Celexa if you wish to animate you will need EyeCandy5 Nature I have added the selections in with the supplies so just copy and paste them to your EyeCandy5 Impact settings folder you will find they are called Silverymoon
Ok here we go
Open a new transparent image 550x550 pixels and then flood fill with white
Open the Gem mask and paste as a new layer centre in your working image
Now open the Black stars from the kit and resize to 60% smartsize all layers unticked paste as a new layer
Now open the frame and resize to 65% and paste to the centre of your mask area
Now using your selection tool set on rectangle draw out the blank section of the small frame and then copy and paste the image I supplied as a new layer move it around so you can see the moon then up to selections invert hit delete on your keyboard
Now draw out the other side of the frame and then selections again rectangle copy and paste the image again move it around so you get only the trees selections invert delete on your keyboard move into place
Just a note on the small frame I selected it with may magic wand then added a new layer and modified selections by expanding by 3 and then filled with a solid gray but you can keep the frame white if you wish.
Now copy and paste your tube then duplicate the tube bring one layer to the top close this layer off for a moment
Now add the kits double wrap 2 ribbon resize to 65% image mirror and paste to the bottom of the frame
Now open the black folliage resize to to 65% and place on the top left layers duplicate and mirror so you have one on both side
Now you can bring back your top layer tube and erase any that sits over the ribbon don't worry as you have her under your frame as well
Now open the Black flower resize to 25% paste as a new layer now I duplicated it 3 times to give me two for the top and two for the bottom
Now if you don't wish to animate your now ready to resize your tag to 90% all layers ticked then add your artist credits and your name
Animation
Using your selection tool set on free hand draw out the centre of the cauldron 
Now to effects EyeCandy5 Nature/Smoke
Now you should find the silverymoon selections you just added
Now click into your selection and then click silverymoon setting in eyecandy up to selections none edit and copy merged in to animation shop as a new image
Now back to psp undo so your selective ants are then eyecandy and this time change the random setting on bottom then selections none edit copy merged into animation shop edit in animation shop and paste after current frame
You need to repeat this another 4 times to give you 6 frames
Up to animation/animation properties and change to opaque white
Then view view animation and you are now ready to save as a gif file
If my selections for eyecandy do not work Lol I used these settings
Setting medium dusttrail
Smoke type wispy
Direction 95
Length 303.95
Size 9.46
Expansion 100
Waver 82
Roughness84
Opacity 70
Start from bottom ticked
First random seed 7037
Colour and Lightening
I choose a light cream
Soot 14
Direction 48
I hope you enjoy this tutorial
©RealGemDesigns2009 Tutorial registered with TWI
http://www.tutorial-writers-inc.com/index.php
Join my Forum
http://forum2.aimoo.com/PSPRealmsOfFantasy11


No comments:
Post a Comment