
Iam using the beautiful art of Rebecca Sinz which you can purchase from AMI
My Supplies HERE I made all the frames and patterns
You will need the Vanderlees Snowfilter if you wish to animate you can download it from
http://www.vanderlee.com/plugins_snowflakes_download.html
.Install the plugin to C;Program files//Jasc/Corel PSP Plugin folder
I have included the font I used Chiaroscuro which is a free font.
Lets get to work this tut is a little involved so please read through each step.
Go to file new image transparent image 600x600 pixels
Then click on your flood tool and fill the image with white.
Add a new raster layer
Open up the Gem pattern on to your workspace and change your foreground to pattern and locate the pattern change your background colour to white now to your brush tool and choose air brush with the below settings spray across ways until you have section covered you may need to do it a few times to get a nice background fill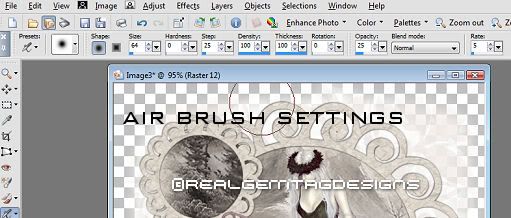
Now you need to make a brush pattern as above thi will be the base of the tag similar to a mask I have included my brush pattern if you have problems with it
Open the misted image on to your workspace
Once you have your brush pattern open the small Gem frame and the small circle base place the frame above the circle base go to your selection tool and click into the frame then click on your misted image edit copy and then paste as a new layer on to your selected circle then to selections invert and hit delete on your keyboard this will take off the excess
Now duplicate the frame the circle and the image and move them down so you have two smaller circles on the side On the 2nd circle I mirrored the misted image you can do this by going to image mirror. To change the colour of the misted images click on each one go to adjust Hue and Saturation and use these settings Hue 18 Saturation 30 you can make it any colour you wish to suit your tube by moving the sliders.
Now open the large circle base and the frame and then same as before magic wand paste as a new layer selections invert delete on your keyboard.
Make sure the large circle and frame and image are on the bottom layer above your brushed layer Once you have everything in place you are ready to add your tube I added a drop shadow of h1 v1 55 opacity colour black blur 4.00 shadow on new layer unticked
If you are happy with the tag now I resized mine by 90% smart size maintain orginal size ticked
Now you are ready to add your credits and your font work
I used Chiascuro font size 48 pixels Antialias Sharp stroke width 0 and then added the same dropshadow as the tube.
If you do not wish to animate you are now ready to save your tag.
Animation
Click on to the large misted image circle up to selections select all float then defloat up to effects Vanderlee snow with the below settings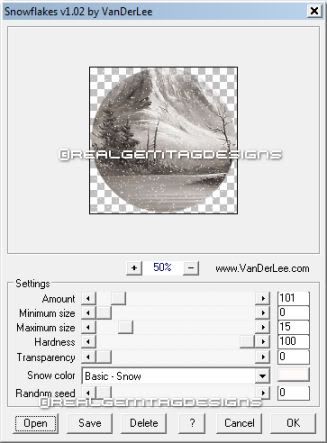
Then up to selections select none now click into your smaller frame and repeat the effect then selections none and then repeat the selections for the 2nd frame then selections none up to edit copy and paste into animation shop as a new image
Now back to psp and click undo to take all the snow away from each frame then start again but this time change the random seed on the filter to 5 select none when finished edit copymerged into animation shop click edit in animation shop and paste after current frame.
Repeat the above undos and change the random again to 10 repeat the steps above then do it all one time more and change the random to 15
Then in animation shop click view and view animation save as a gif file
I hope you have enjoyed this tutorial
Written by RealGem 9.04.2009 Tut Registered with TWI


No comments:
Post a Comment